Nuke Icon Toolkit
nuke_icon_toolkit is a collection of high-DPI (512x512) icons for Foundry Nuke, intended to help you replace the low-resolution icons included by default.
Flags can change a knob’s appearance or behaviour. They are useful for doing things like:
Only a few knob flags are registered in Nuke’s Python module, which makes them a little difficult to use.
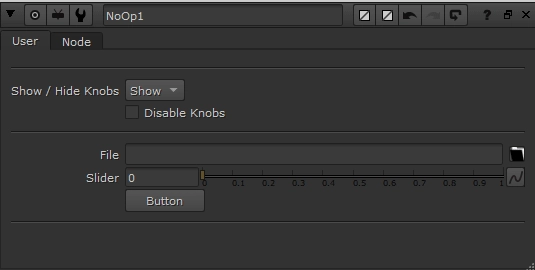
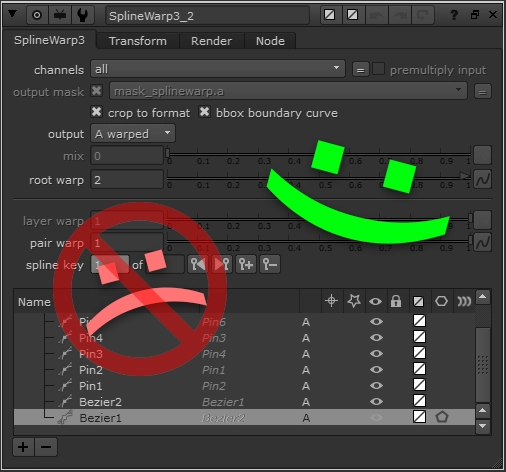
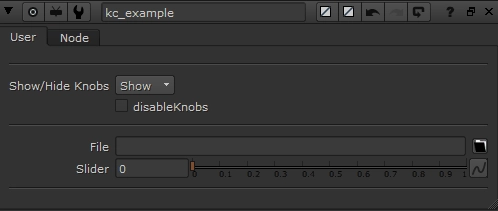
Some gizmos dynamically hide/show a number of knobs with the KnobChanged python callback. This is a good option to keep your gizmo's UI clean, but can start to get very heavy when you have too many knobs to handle, and too many nodes inside your gizmo.
Instead, it can be cleaner to use Python Script Buttons to add/remove knobs/nodes from your gizmo to keep things fast, neat and tidy.
I whipped up the following example node, which you can download here, to see how this works.
Some nodes in Nuke, such as the Particle Emitter or your favourite Camera Shake gizmo, have a random seed knob. This allows you to create a different variation of a setup using the same parameters on a given node. When these setups are used throughout a sequence, we often want to change up the random seed value so every shot matches an approved look, but doesn't behave in exactly the same way.
When setting up a sequence template, you could expression link all random seed knobs to a NoOp-based control panel, but there is a better, more automated way to get a "random" value by default.
Icons are an incredibly useful design tool to enhance user experience and readability. In Nuke, we only see icons in the Nodes toolbar by default. However, there are other areas we can add icons to increase usability & Nuke script readability. In this tutorial, I'm going to show you five practical examples.
Happy New Year 🎉
As you know, I'm all about sharing knowledge & continuously improving my skills. It has been great to see so many Compositors start to create in-depth Nuke content in 2020 & 2021 -- something that has been missing in our community for so long. To kick off the new year, I wanted to celebrate my favourite creators from the Nuke community, and share the tools I've been using most often.
There are two common ways you can expression-link knobs in Nuke.
The TCL syntax for expression-linking knobs is simple: {node_name}.{knob_name}.
However, there are some knobs that are a little more difficult to expression-link. For example, a channels knob can only be linked to other channels knobs, by CTRL+dragging+dropping the = button between them. Additionally, there is no visible option to expression-link Pulldown Knobs, such as a node's filter knob. However, we can solve these problems with a little bit of Python.
In the following example, we're going to be expression-linking Transform2's filter knob to Transform1's filter knob. Let's write one line of Python to help us do this in the Script Editor.
In Nuke, you're able to dynamically change any knob's value depending on if you're looking through a Viewer in Nuke's GUI, or rendering your Nuke script on a render farm. This can be useful to keep your Nuke scripts light & efficient while working, while automatically switching to more processor-intensive tasks at render time — for example, increasing motion blur render samples.
Gizmos Nuke Python VFX Industry Workflow
Compositing CG renders into a plate with a rack focus can sometimes be tricky to get right. However, your defocus has to match perfectly, otherwise the illusion falls apart! Manually creating keyframes and adjusting curve slopes can be a bit cumbersome, so I thought there had to be a better way to approach this. In this tutorial, I will share what I came up with!
We can learn a lot about what our CG needs by taking cues from our plate, and matching defocus is no exception. We can look at the size of our plate's bokeh shapes, or how soft high-contrast edges are for reference. Animating a rack focus is a natural extension of this!
Nuke's merge node has 30 operations, and finding a Compositor who has utilized them all would be a difficult task. However, I want to shed some light on two merge operations that are incredibly useful, and don't get as much love as they should.
The most common operation, Over, is pretty self-explanatory: The image in the A pipe goes over the top of the B pipe. So how and why would this concept need to be expanded upon?
When working with CG renders that have baked-in holdouts, or if you're creating and precomping your own holdouts using Deeps, you might find that you get dark edges when merging everything back together. This is where disjoint-over can help! Let's take a look at a quick example to demonstrate:
Jedediah Smith has been burning it at both ends in VFX for 10 years. He's worked as a Compositor, a VFX Supervisor and many roles in between. Self-taught since his origins in the wilderness of Alaska, he has a massive fascination for the intersection of art and technology. Playing with code, fiddling with cameras, building nodes to create pretty pictures… That's the best quality time.
Nuke scripts often start out as well-intentioned, clutterless masterpieces that even Marie Kondo would be proud of. However, endless revisions and client notes in the heat of a deadline often cause tidy Nuke scripts to unravel into unintelligible, slow messes.
Compositors often lean into pre-comping to help wrangle these large, lethargic beasts, so Nuke will run at an interactive speed again. This article will cover best practices when pre-comping, to ensure you maintain optimal speed with your image processing.
Josh Parks is a Senior Compositor at Important Looking Pirates. He’s worked in Film, TV and Advertising. Since starting in the industry, alongside compositing, Josh has been privately coaching students to VFX supervisors, as well as lecturing at universities.
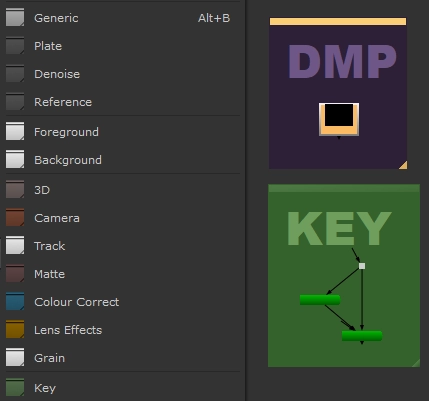
When adding a new gizmo to a menu inside of Nuke, I like to recycle the existing icons so I can keep everything thematically consistent. However, these icons are buried inside Nuke's install directory, and I always forget exactly where they live...
The beginning of my Compositing career started with After Effects, and while I'm now living and breathing Nuke, there's one thing I still miss -- the ease of use of After Effects' animation tools.
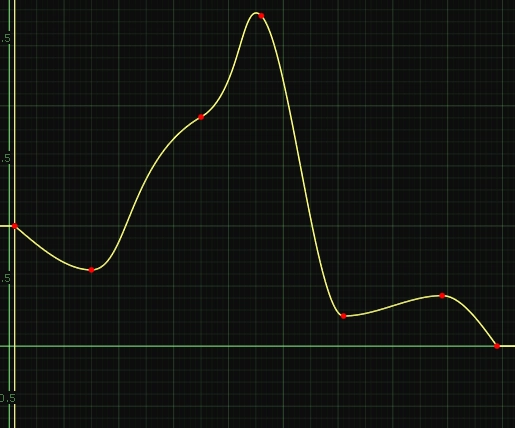
Coupled with a recent fascination with bezier curves, I decided to set out and see if I could bring the most basic functionality from After Effects, "easy ease", into Nuke, with a way to control the smoothness of that curve.
Comp Newsletter For Patreon Supporters Python

Thiago Porto is a VFX Supervisor, and Senior Flame & Nuke Artist for MPC Advertising in New York. He is also one of the leading forces behind researching Machine Learning for 2D-based applications in our industry.
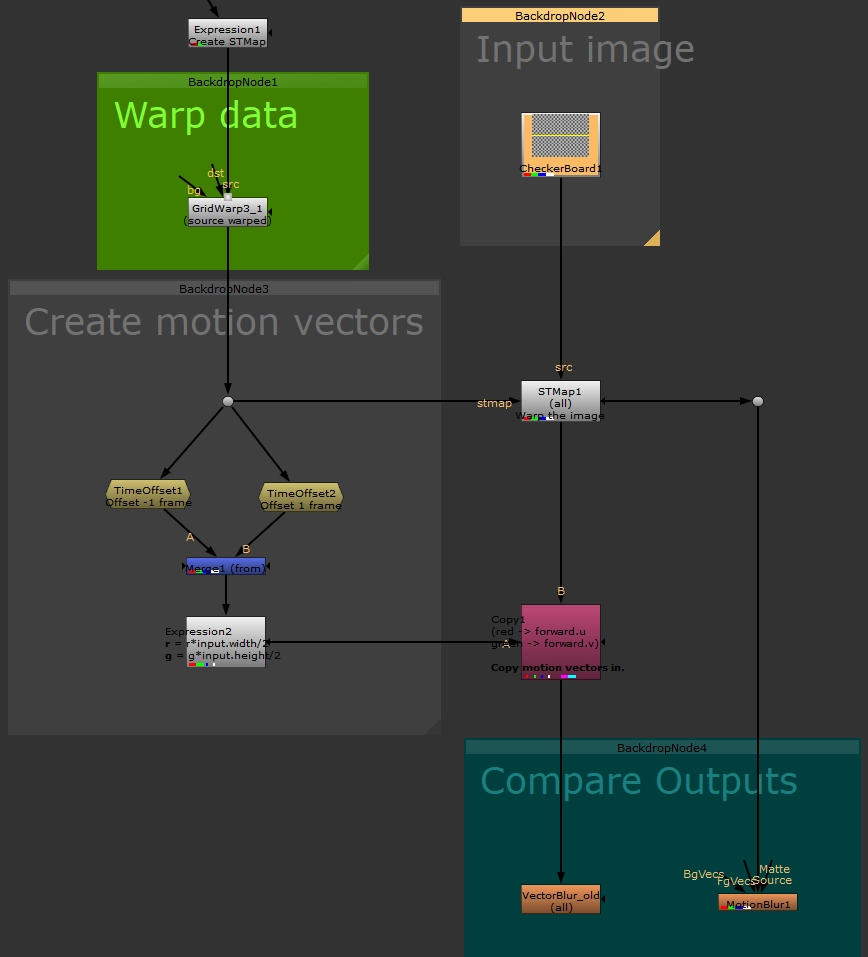
When warping, I always use ST Maps as the base, as they provide so much extra control. Nuke's built-in "MotionBlur" node, RSMB, and other nodes are available to generate motion blur from our warped input images, however, these nodes are generating new motion vectors, essentially making their best guess at where the pixels are travelling. Wouldn't it be better to use our warp data to drive this instead?
Using TCL expressions in Nuke can help us to evaluate mathematical operations, as well as link values together to create something new. However, an often forgotten feature in Nuke is the ability to add expressions to RotoShapes and Paint strokes (which are also splines under the hood).
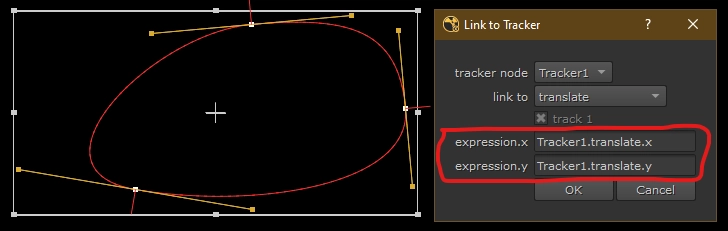
Nuke's built-in "Tracker linking dialog" (pictured above), helps us to link individual vertices to various things in a Tracker node, and is doing so by automatically adding TCL expressions for us! However, what if we wanted to link things the other way around?

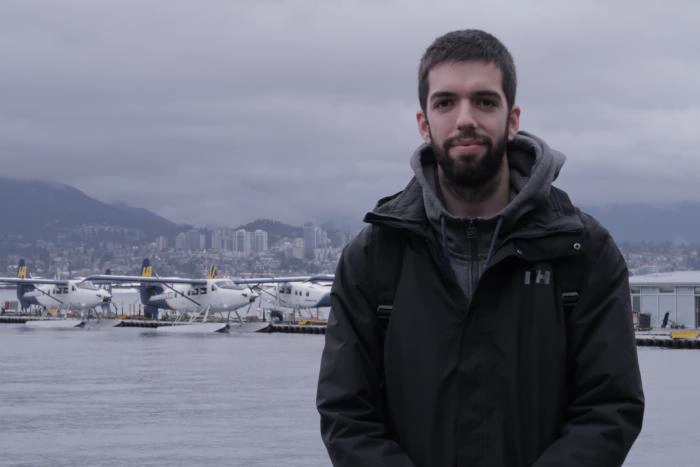
My name’s Pedro Andrade and I’ve been working in VFX for around 10 years and out of a complete accident. I have a background in Mechanical Engineering and I effectively worked as one in different countries until I took a chance and left that field to pursue a career as a Music Producer in London - which I also did for a while. Then, in London in a sort of twist of fate, in a completely unplanned way, I came across with VFX, an industry in which I’ve been working as a 2D supervisor for some time now in companies like Milk VFX, Cinesite and more recently DNEG.
A couple of months ago, fuelled by the current pandemic situation, I’ve started a little project in the form of a live show on YouTube called ‘Comp Lair’.
Apart from that I love traveling (!!!), food, spending time with family and friends, playing and hearing music, holidays, etc.
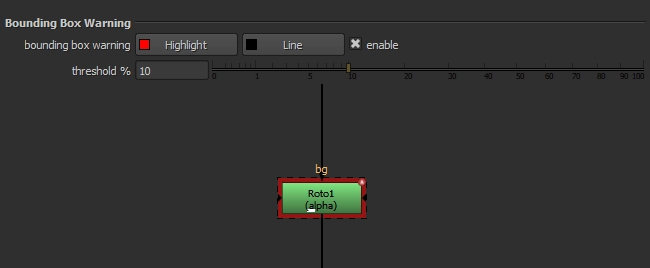
You might have seen gizmos with knobs that dynamically disable/enable, or hide/show, based on the value of another knob. This is achieved by accessing the knobChanged knob, which is hidden to users, and can be accessed via Python.
We've all had one of those shots where our CG animates through frame and needs to change from one lighting condition to another. Perhaps this is a character travelling from indoors to outdoors, flashing lights in a scene, or an object passing through atmospheric haze; it can come in many forms.
Hi, my name is Geoffroy Givry, I’ve been in the VFX industry since 2001, first as a Generalist and I quickly became a full-time Compositor around 2003. I’m a proud and dedicated husband and father of 3 wonderful children. I love looking after my family, my garden, cooking BBQs, chopping wood and building AI Drones. But most of all, my two real passions are learning (I’m addicted to video tutorials!) and in developing pipelines and intelligent workflows for the VFX industry, especially everything concerning remote work.
I created my own company in August 2019 after being at ILM for 5 years as Senior Comp, Comp TD and Comp Technical Lead. Now, I’m working remotely in the gorgeous countryside of Surrey in the UK, as a Visual Effects Supervisor, pipeline architect and senior compositor. As well, I am an Art Director and VFX Supervisor for Ubisoft on their game cinematics.

Over the last two parts of this series, we've talked about how the Coronavirus pandemic has impacted the VFX industry globally, how VFX vendors are adapting, and the opportunities presented to us to manage our own time, increase productivity, and gain greater flexibility in our lives. In this third and final part, we'll discuss some of the potential pitfalls that working from home brings, how you can make the most of the situation, and even find an opportunity for growth.
After graduating from Vancouver Film School I started my VFX career in 2007 at Image Engine in Vancouver where I worked for 8 years, with my last project being VFX Supervisor on Straight Outta Compton. I then went to OATS Studios and Umedia before returning to Image Engine again as VFX Supervisor on Pokemon: Detective Pikachu. After wrapping that one up I started my own business under Hive VFX using AWS.
Outside of geeking out at a computer, I enjoy anything in the outdoors, hiking, running, biking and skiing among others.

My name is Gen (Genevieve Camilleri) and I recently finished working on my first feature film as a VFX Supervisor for Mill Film, Adelaide. I started my career 11 years ago in Melbourne, Australia and have since worked as a Senior compositor, Lead Compositor, Compositing Supervisor and DFX Supervisor for various studios such as ILM Vancouver, Animal Logic Sydney and Method Studios Montreal.
Outside of work, I enjoy spending my time outdoors doing anything from hiking, climbing to snowboarding.

In Part 1 of this series, we take a look at why security in our industry is water-tight, and the infrastructure challenges presented by working from home. It shines a bright light on how incredibly many folks have adapted to the new ways our industry has been forced to operate. If you haven't yet read it, you can do so here.
For the VFX industry and its workers, the global Coronavirus pandemic has presented an incredible opportunity to step up, and prove we can do better. Just like Movie studios, VFX vendors are first-and-foremost a business. Successful business growth requires many things, but the underlying tone of it all is: a constant increase in productivity generates more profit, which generates expansion and more work, which then needs greater productivity, and so on.
Over the past few years, I've enjoyed reading about intelligent folks' systems, and how they manage their time and energy for maximum output every day. One of the primary benefits of working from home is having more control over managing our own time. In this article, I'll be sharing some tips on how I leverage this flexibility to be a more effective member of my team.
For many of us, the past few weeks have been some of the strangest, most uncertain times in recent history. The Coronavirus has shut us all in our homes and threatened our contract-based livelihoods for the foreseeable future. Movie studios are postponing productions, and VFX vendors worldwide are rapidly adapting both infrastructure and security protocols to enable artists to work from home and finish existing projects, where possible.
For the VFX industry and its workers, these global changes present an incredible opportunity for us to step up, and prove we can do better. Working from a remote location (in this case, home) offers plenty of benefits to employers, employees and our valuable clients. Some industries already thrive in location-independent workplaces, and have made this transition seamlessly, but what about the VFX industry? Working from home has never been an option for us in the past, so why has it taken a global pandemic for this sudden shift in mindset, and how can we make the most of it?
I started my VFX career 17 years ago, and since then I’ve worked for different studios in Barcelona, London, San Francisco and Vancouver. Currently, I work at ILM Vancouver as an Associate VFX Supervisor.
Outside of work, I enjoy photography in general, and astrophotography in particular, although I don’t get to practice those hobbies as much as I used to.

CVD VFX founder, Chris van Dyck is a Vancouver-based VFX Artist and Supervisor with over 16 years in the industry. He brings experience from some of the top studios around the world: WETA Digital, Industrial Light & Magic, Method, Rising Sun Pictures, Animal Logic, MPC and Prime Focus. Some of his most notable credits include: The Hobbit Trilogy, Warcraft, Thor 2, Life of Pi, TRON: Legacy, Harry Potter & the Half-Blood Prince, Iron Man, Frank Miller’s 300, Game of Thrones and Stranger Things.
Chris has conducted lectures for the VES, SIGGRAPH, and the Art Institute, been published by Digital Fusion on the topic of Digital Compositing, published by SIGGRAPH on the film industry in Vancouver and has taught Digital Compositing for over 7 years at the following schools: VanArts, Think Tank and Lost Boys.
As Head of Studio at Crafty Apes: Vancouver, he is passionate to grow a team focused on Quality of Work & Quality of Life.
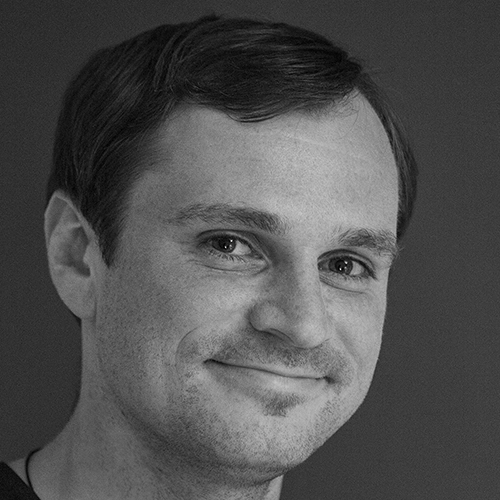
Hi, I’m Ben Kent and I’m a Lead Research Engineer at Foundry, as well as a screenwriter, producer and director.
I first joined Foundry in 2001 to work on the original Furnace suite of plug-ins, and I was one of the recipients of the 2007 Academy Award for Science and Engineering.
In 2011 I took a slight detour into the world of production and whilst making a number of shorts and adverts and doing a load of VFX work, I wrote, produced and directed my feature debut. Comedy horror Killer Weekend came out just this year, and so far has been licensed for distribution in over 15 countries.
At the beginning of 2018, with little left for me to do on the film, I returned to Foundry where I quickly remembered how much I loved both the company and the work. Now I lead the development of the NukeX research plugins and, more recently, the A.I.R (Artificial Intelligence Research) project.
My name is Freddy Chávez Olmos. I’m a Visual Effects Supervisor currently working at Barnstorm VFX in Vancouver. I also write and direct short films mostly in the horror and sci-fi genre.
When integrating CG characters into a plate and something seems not-quite-right, the first solution I look towards is adding more occlusion shadows, often referred to as "Ambient Occlusion". Occlusion shadows help ground our CG characters and really connect them with the environment & live-action characters around them.
Most physically-based render engines are capable of rendering occlusion shadow AOVs, which are quite accurate when given photometric lights, but sometimes mathematically real and visually real isn't the same thing...

A common complaint I hear among compositors, especially those working on large shots is: "My script is so slow". There are many things to consider when trying to speed up a cumbersome script, but the sneaky culprit usually reveals itself in the form of a ReadGeo node importing geometry over the network.
HTML is a programming language designed to view documents or websites in a web browser, although we can make use of it in Nuke to add some extra style to our nodes, gizmos, etc.
The aim of this article isn't to teach you HTML, as that would be rather convoluted for what you need to know, but instead, I'll share some easy snippets of code that will help you inside of Nuke!
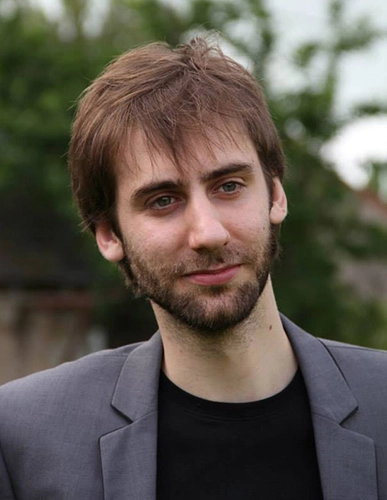
I am a digital compositor from Madrid, Spain, who has been living in different countries and working in different studios in the recent years, and who is really passionate about the technology of VFX and the technical part of image manipulation and learning something new every day. I’m fascinated by the world of compositing and although I’m an artist I keep getting attracted to programming. I am currently working as a freelance senior compositor in Trixter (Munich).
Since I was a child, I have always been fascinated by photography, film and the magic of combining and manipulating images. Having decided early to live my passion and what I love, I studied a media degree at the University of Applied Sciences Lübeck, Germany and did a study abroad at the Auckland University of Technology in New Zealand where I gained a broad knowledge about media production.
In 2012 I obtained a Bachelor of Science in Information Technology and Design. I worked as a Nuke and Flame Compositor for 5 years and then switched to the technical side. Currently, I am employed as Pipeline TD at Pixomondo where I concentrate on the 2d pipeline.
In my spare time, I created my own software brand Cragl VFX Tools where I develop commercial and free plugins for Nuke. I have taught several Pluralsight courses and have written multiple technical papers about Python programming.
I didn't know the name at the time, but I always was a bit of a nerdy kid. I was into cartoons, video games, and fantastic worlds. I learned to use a computer and started playing with some graphics software before I learned to ride a bike. When I was 10, I wanted to become a "video game maker", but didn't quite know what it was. Grown-ups told me I could choose to learn programming or CG, so I started playing with both a little. Not knowing English at the time made it a bit trickier to pursue programming, so I went the CG route instead.
I started professionally as a compositor in 2008. Little by little I started including programming into my work day, and it now overtook the amount of compositing I do. I have been working for SPINVFX since late 2016, first as a lead compositor, then head of comp, and now head of 2D.

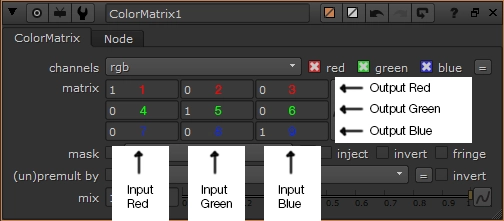
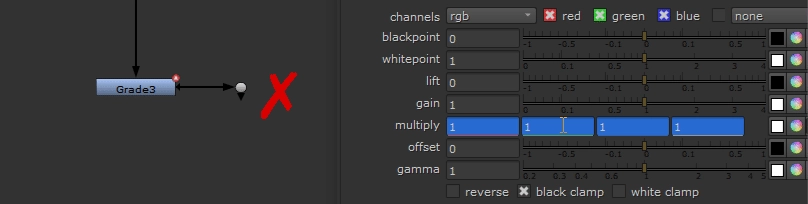
Something I'm endlessly frustrated by is having to work around the way Nuke uses confusing hex colour values in Python to do things such as set a node's tile_color knob. For example, how are we supposed to remember that 0xff000ff = green ? I wrote two simple functions to get around this, which I hope you can make use of too...
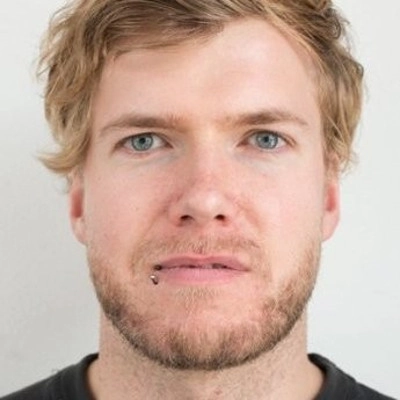
I am Falk Hofmann and a compositor for roughly a decade. Since a couple of years also TD and recently I joined RISE FX | Berlin as Compositing-Supervisor. Besides that, I like to play around with my Raspberry Pies, occasionally writing Android apps and be outside in the garden. A personal aim is to bring these three together and enjoy them all at once.
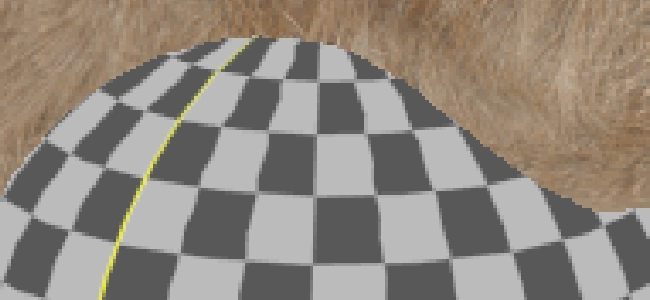
Image filtering is a necessary step in many tasks we do in computer graphics, but it often gets little cognisant attention from Compositors. When mentoring junior artists' recently, I discovered they rarely know of this fundamental knowledge at all! So I thought it would be beneficial to write this article so we can brush up on the basics, maybe learn a new thing or two, and have a resource to point others' towards if they're stuck with this concept.

Originally from Clatskanie, Oregon, Miles Lauridsen is a VFX artist now living in Vancouver, BC. Currently a Compositing Supervisor at Scanline VFX, he's worked in various roles including dustbuster, matchmover, 3d generalist, title animator, and compositor within feature film over the last 13 years. He enjoys the problem solving process that VFX entails in the service of helping filmmakers tell their stories.
My name Mads Hagbarth Damsbo. I am a compositor, vfx technical director, pipeline technical director, occasionally supervisor at Nordisk Film - Shortcut (Copenhagen, Denmark). Now also a sparetime iOS app developer and with the release of the PointRender a Nuke developer as well. All along with my daily life as a husband and father of 2 wonderfulboys.

João is one of those rare people who is the trio of super talented, humble & incredibly inspiring all at the same time. His long and diverse career in VFX spans a variety of Commercials, TV and Film projects, and has taken him from his home country in Brazil, all the way to Canada, where he now works at Framestore Montréal.
I had the pleasure of working with João at Image Engine, where he shared some valuable lessons, and helped me along my never-ending journey towards becoming a better artist. He was gracious enough to share this insightful interview with me, which I'm excited to share with you!

Mark Joey Tang, known as "MJ", started working in visual effects in Hong Kong, circa 2003. Throughout his career, he has worked with a handful of different studios from RodeoFX to Atomic Fiction (now Method Studios), and is currently a Senior Compositor at ScanlineVFX in Montreal. I reached out to MJ after discovering his unique tools on his Facebook page (which you can find below), and asked about his career in VFX, including how he got into programming & creating tools for Nuke.

A common problem we face in visual effects is what DoPs might refer to as "dynamic" lighting; aka light sources that change colour and intensity throughout the shot. It makes our images look more interesting, but adding any VFX to these plates instantly becomes more complex. Common examples include flashing police lights, in-camera lens flares for dramatic effect, and shots lit entirely by flashing neon lights or a fire. The latter is most complex to manually animate, so it will be the example I'll use in this article.


 button, and voila! You've got yourself a really nice denoise; far better than any other denoiser out there today with the click of a button. But what if I told you it could be even better?

$gui expression to its samples knob. So, why not automate that? Here's my solution code for your menu.py first, explanation below):
Contact sheets are something I use all the time to run out wedges of certain looks & compare my work against other shots in the sequence. Although, the Contact Sheet node is kind of... basic. It lacks a few features & requires a lot of initial setup to actually be useful. The aim of this article is to share some knowledge on the defaults I have in my contact sheet node & how to set contact sheets up more-speedily.

When compositing, it can help to switch to a different colourspace to get the result you're after. This article intends to gloss over the basics of what each colourspace is actually doing to your image_ (I'll provide links for further reading, if you're interested)_, and instead provide practical examples of how different colourspaces can help you achieve better results.
You've just completed another "big push this week". Don't you feel great for what you and your team have achieved? I bet your answer is, "no Ben, because we're already thinking about the big push we need to complete next week!" The VFX industry is a vicious cycle; if you don't take time out to recover periodically, you'll eventually burn yourself out.

This article was sparked by a good friend, and a junior colleague, who both approached me with similar questions of, "How do I become a better Compositor?" This is something I believe we should all ask ourselves from time to time, no matter our years of experience, and is a question that doesn't restrict itself to VFX but instead applies to all walks of life. Whilst on the more philosophical side, I feel this article is relevant to everyone, and I hope my thoughts on the matter inspire you to reach for greater heights.
To solve the question of, "how do I be better?", we first have to get specific and determine the root cause of the problem; The need to improve is often coupled with a sense of inadequacy, which isn't an entirely accurate self-assessment. This is the most pertinent issue I want to address in this article.
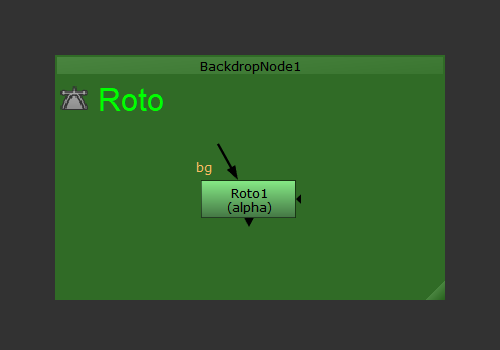
Humans are creatures of habit. To align with this mindset, I have created a python script that enables compositors to set Backdrop Node presets in their menu.py!
I often find myself labelling nodes with descriptors, so it's clear what each node is doing. This usually involves a TCL snippet to return a value of a certain knob. This article is intended to serve as a reference, so we have a good cheat sheet to turn to when we might need to find a specific TCL snippet.
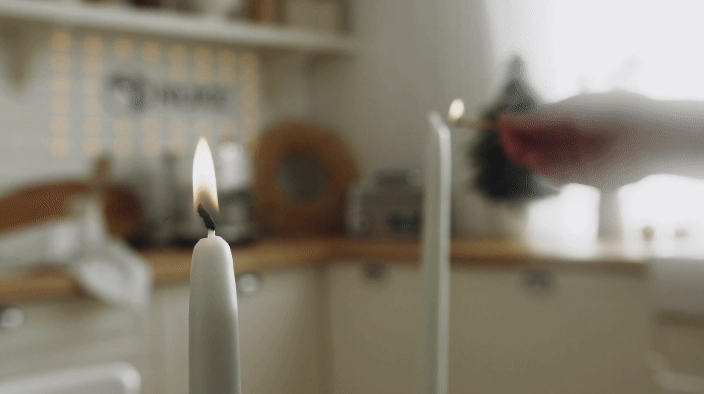
Matching grain can be tricky at times. The best way to add grain to your comp & get it to match the plate is to just use the grain from the plate!
For this example, I'm going to be using this stock footage from videvo.net.
First, we have to identify when this technique is useful, and when it might not be...

Despilling is arguably the most important step to get right when pulling a key. A great despill can often hide imperfections in your alpha channel & prevents tedious painting to manually fix edges. You're already aware that keyers like Keylight, Primatte, IBK, etc. despill your image, but what happens if their results are coming up short? It's absolutely worth your time to dig into some maths & understand how despill algorithms work, and how you can implement them using the Expression node in Nuke.
We've all been in that place where we're watching our shot on loop, can see something is missing, but just can't figure out what that thing is. When I find myself in this scenario, I Give it 10 , and the problem solves itself! Here's how it works...

Of all the people I have met whilst working in the visual effects industry, I have never met another artist who is truly ok calling something "good enough". It's a title that is begrudgingly assigned to a shot when they know they don't have the time to push it any further. In saying that, is there really such a thing as the "perfect shot"? I would argue no, and here's why.
You may have used a gizmo in the past where toggling a checkbox enables/disables a set of knobs, or choosing a certain value from a Pulldown Choice will hide or show another set of knobs. What wizardry is this??? At least that's what I asked myself when embarking on my first gizmo-creating frenzy...
After searching the web, I came across many threads in many forums explaining this mysterious thing called "knobChanged", accompanied by a load of copy/pasted code to explain how to use it. With my limited knowledge of Python at the time, I had no idea what any of it meant. I just wished there was someone who posted what I needed and that was it. If this describes you right now, you're in luck!
Nuke is incredibly flexible and customizable out of the box, and empowers artists to work they way they want to work to get a shot to final. But there's a whole other world of untapped potential when you utilize Python to further expand it! In this post, I'm going to show you an example of how even the most simple python script can save you time every day.
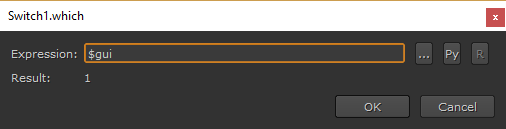
$gui is a simple TCL expression that tells Nuke to process a value differently in the Viewer (or "gui") vs. when rendering on the render farm.
To use it, simply right-click on any knob in Nuke, choose "Add expression", and enter $gui in the expression field.
There is always more than one way to solve a problem in Nuke, although some ways are definitely better than others. The aim of this post is to make you aware of the things you should & shouldn't do, so you can retain as much image quality as possible in your final comp, and work speedily without Nuke grinding to a halt.
You may have heard other compositors refer to a menu.py, or a "preferences file" in the past. What the hell is that?!
A menu.py is a python file that Nuke will read upon starting up each time. It contains data such as:
Most studios will have a menu.py to setup specific things for the entire studio, as well as a second menu.py file to change certain things on a per-show basis. But you can also create your own menu.py to customize things for you, and you only! There is a lot of power in customizing Nuke to work in the most efficient manner, based off the way you think and operate.