SplineWarp hacks for an easier time when warping
Nobody likes getting to that stage of a shot where they come to the realization: "damn, warping is the only way..." Although, there are certain techniques that can make the process more streamlined and manageable. I've noticed Compositors, myself included at times, attempt "just a quick and easy warp" without setting things up properly, only to find themselves fighting the node, changing things back and forth, and ultimately wasting so much time for the smallest improvement in their shot.
The goal of this article is to share some tips on how I approach warping with the SplineWarp node and to help you resist the urge to put your Wacom tablet through your monitor.
Start a warp like you would roto
When we roto, we start with a track of specific areas to try and get some of that motion for free. Then, we generally look for the start & end points of extreme movement to set our initial keyframes. It certainly helps for roto, but this tip alone will save 80% of your time when trying to warp anything.
Make use of the Tracker Linking Dialog
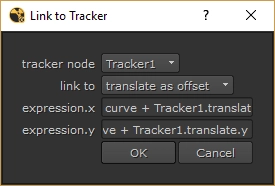
Doubling-down on my first point, it will always be worth your time to track as many areas as possible, even manually, for both source and destination areas... You will save so much time and get most of the way towards a final result if you can link all your bezier points and pins to trackers before adding any keyframes.
To use it, simply select one or more points in your Viewer, right-click, choose Link To, then Tracker Linking Dialog... You usually want to choose the translate as offset option, so you can keep the original position of your point, but offset it based off the Tracker's translate/rotate/scale data. Note: this takes the Tracker node's reference frame into account, so you'll want to set the reference frame number in your Tracker to the same frame you add your beziers & pins to in your SplineWarp node.
Speaking of keyframes:
Use as little keyframes as possible!
The more keyframes you place, the harder it is to keep the warp's animation smooth and accurate. It's hard enough having to counter-animate against the plate, let alone counter-animating against your own existing keyframes!
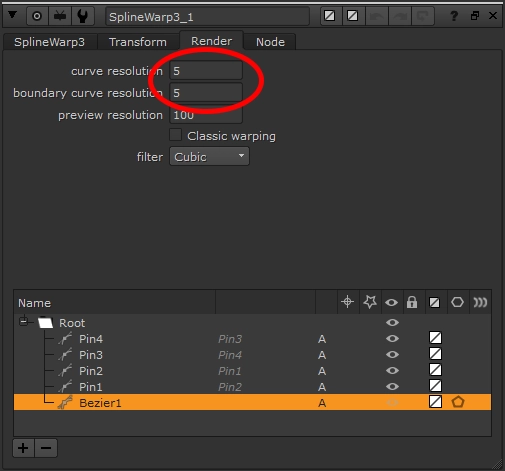
Up your resolution before warping anything
The spline warp node defaults the curve resolution and the boundary curve resolution to 3. I set these to 5 by default in my menu.py. Whilst it increases processing time, the result you get is so much smoother and more natural. Unlike the preview resolution knob, if you lower these numbers to work faster, you'll get a very different result, so its best to set this value before you start warping, and never change it !
Avoid the B pipe if you don't need to use it
Source/destination based morphs require the B pipe to operate. But a lot of the time when warping, you can duplicate and join shapes to remain in the A pipe, whilst retaining the ability to warp the single element as expected. Simply put, using the B pipe will double processing time, as you're essentially warping/processing two images...
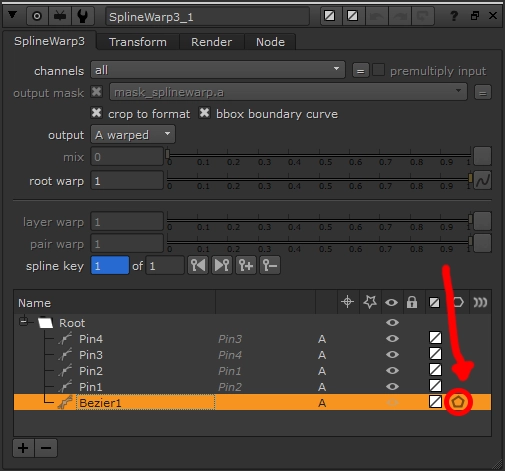
Boundary shapes are your friends
It's weird that these options are hidden behind icons with no labels; I've met Compositors who don't even know the boundary options exist! I honestly can't work without them -- they prevent my warps from getting completely out of hand. Always use hard boundaries to restrict the SplineWarp's area of effect.
As a bonus, you can reuse these boundary shapes as a hacky way to restrict how many pixels the SplineWarp processes! Copy/paste the boundary rotoshape into a Roto node, then use that as a mask to Keymix between the SplineWarp (A) and un-warped image (B).
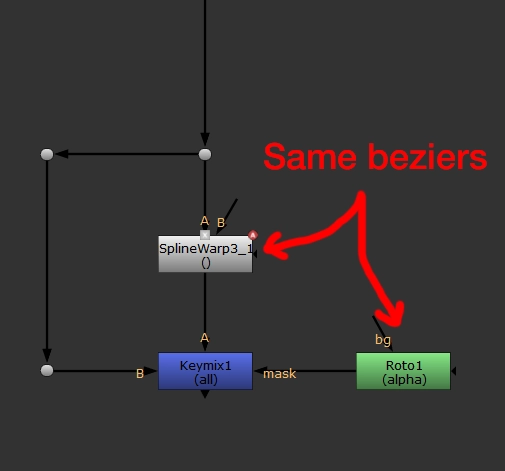
Now you have nice results that both process and render quickly, and more-interactively! You are able to get the SplineWarp node to output an alpha channel, and Premult afterwards. Visually, this will look identical, although the SplineWarp still appears to process the entire image first. It's a subtle, but important difference...
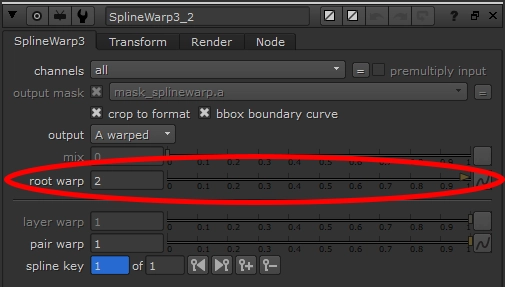
The root warp slider isn't restricted to values between 0 and 1
Warps are usually pretty finicky. If my shapes are already tracked and I've added the important keyframes but my warp still isn't perfect, I try to utilize the root warp slider. It's essentially a mix knob for how much or how little to warp the input image. An unknown feature of this slider is that it only goes from 0 to 1, but you can force the value to go beneath 0 or higher than 1 for reverse-warps and double-warps! It's super handy for getting your warp just right without having to click & drag points in your Viewer.
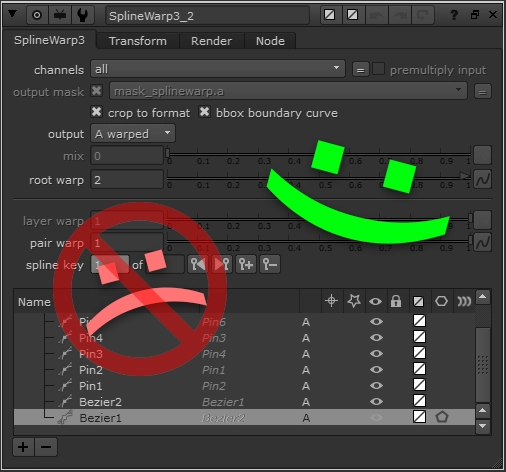
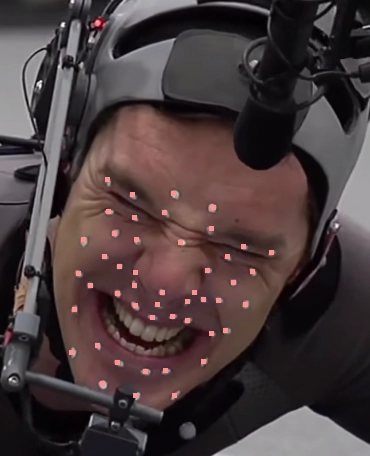
Pins are your friend - use them!
Pins are great, not only because they can hold certain parts of your image in place, but because they work more-predictably than beziers when warping! Let's say you're trying to warp a face with beziers -- you would have to essentially roto every single feature of said face! With pins, you can treat your warp as an animator would their mocap plates. This gives you far more control, and therefore is more accurate!
You will create Beziers & Pins based on the context of your viewer

Keep an eye on these small buttons up the top-left of your viewer. Any new beziers or pins will be created in A, B or both depending on which is selected. They can save you some clicks, or some headaches trying to figure out why your SplineWarp node isn't behaving as expected.
Whilst you're looking at this toolbar, I encourage you to explore what the other buttons do. They include some small but handy features (e.g. labelling individual points, hiding certain things, etc.) that you might find useful...
Community Contributions
Thanks to Mauricio de Oliveira for sending me a video about Magno Borgo's FreezeSplineWarp technique, which allows you to stabilize & matchmove SplineWarps like you would a Tracker.
Do you have any other SplineWarp hacks up your sleeve? Please reach out and let me know -- I'd love to append this article with the Compositing community's input, so we can collectively make warping a much easier, less-painful process...