Programmatically editing animation curves in Nuke.
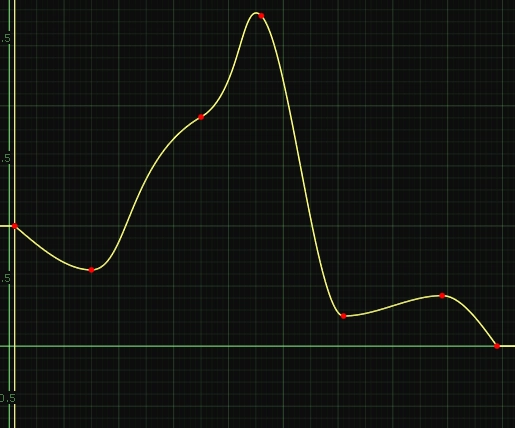
The beginning of my Compositing career started with After Effects, and while I'm now living and breathing Nuke, there's one thing I still miss -- the ease of use of After Effects' animation tools.
Coupled with a recent fascination with bezier curves, I decided to set out and see if I could bring the most basic functionality from After Effects, "easy ease", into Nuke, with a way to control the smoothness of that curve.
To start out, I wanted to explore what was already possible. Selecting a keyframe and hitting "h" on your keyboard changes the keyframe type to "horizontal". If you do that on the first and/or last keyframe of a curve, you get a smooth ramp in/out. However, if it's not easing enough, grabbing one of the handles and trying to adjust the curve quickly results in frustration.
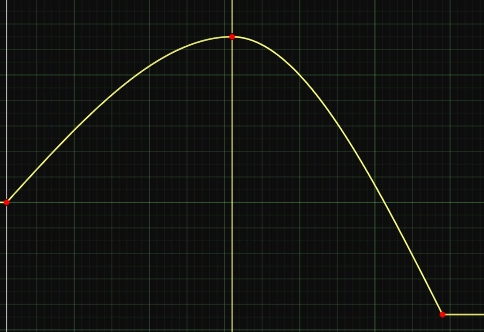
Thankfully, all the properties of a curve can be accessed and modified via Python, so we can write a bit of code to help sort out our dilemma. My goal here is to use the familiar shortcut of F9 to smooth out selected keyframes, and pressing F9 repeatedly should smooth the curve further.
When developing a new tool, I like to start directly in Nuke's Script Editor by creating a node to test the basics. I have created a Grade node with 3 keyframes on the multiply knob, and we can programmatically access these keyframes like so:
1node = nuke.toNode('Grade1')
2knob = node.knob('multiply')
3
4keys = knob.animation(0).keys()
5print keys
6
7# Result: [<AnimationKey object at 0x00000262B501A648>, <AnimationKey object at 0x00000262B501A660>, <AnimationKey object at 0x00000262B501A6A8>]
We can access individual keyframes the same way we would get an item from any other list. For example, this is how to get the first keyframe.
1print keys[0]
2
3# Result: <AnimationKey object at 0x00000262B501A648>
Let's take a look at the components that each keyframe is made up of:

- We have the 𝑥 coordinate highlighted green, which refers to the frame number.
- The 𝑦 coordinate highlighted cyan, which represents the value of the knob at 𝑥 frame.
- The number highlighted orange represents lslope, or the slope of the curve to the left of the keyframe.
- The number highlighted purple represents rslope, or the slope of the curve to the right of the keyframe.
Additionally, perhaps the most pertinent components of a keyframe are .la and .ra, which control the amount of curve; it defines how left the left handle is, and how right the right handle is. This is the exact thing we were unable to do in the Curve Editor at the start of this tutorial (which is why they aren't pictured -- they're not accessible in the GUI)!
Let's see if we can adjust this curve's .la and .ra components to get a slower animation in and out.
1node = nuke.toNode('Grade1')
2knob = node.knob('multiply')
3
4keys = knob.animation(0).keys()
5
6keys[1].la = 3
7keys[1].ra = 3


The value 3 we're giving can be thought of like a multiplier. 1 is the default, so 3 gives us triple the smoothness.
This is probably a good point to wrap our code up into a function, add it to a menu, and assign a hotkey. Adding to the right-click menu of the Curve Editor would be an appropriate place, as it's where users would normally go when they edit keyframes. Save the following code as a new file called bm_Smoothie.py.
 1#import the nuke module, so we can use its functions in our code.
 2import nuke
 3
 4# Define the function.
 5def bm_Smoothie():
 6
 7    # Set up some variables for easy use.
 8    node = nuke.toNode('Grade1')
 9    knob = node.knob('multiply')
10
11    keys = knob.animation(0).keys()
12
13    keys[1].la = 3
14    keys[1].ra = 3
15
16# Add our function to the Curve Editor's right-click menu and assign F9 as the hotkey.
17nuke.menu('Animation').addCommand("Smooth selected keyframes", 'bm_Smoothie.bm_Smoothie()', "f9")
Note: Interestingly, running this code in Nuke's Script Editor won't make the menu we just added show up, even though it should. However, saving the code in its own Python file, importing it into our menu.py, and restarting Nuke makes it do the right thing.
1# Import code for menu.py
2import bm_Smoothie
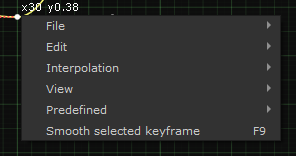
Now, we want to edit this function to run for any keyframe we have selected, and not just the example we currently have hard-coded. To do this, we need to look at the current node and figure out which knobs are animated, before we can find which keyframes are selected. Then we can add the result to a list for later use:
 1# Define the function.
 2def bm_Smoothie():
 3
 4    # Set up a variable for easy use.
 5    # nuke.thisNode() will return whatever node is currently active -- it will conveniently get this context from the user selecting animation curves in the curve editor.
 6    node = nuke.thisNode()
 7
 8    # Create a list to hold selected keyframes.
 9    selected_keys = []
10
11    # Find animated keyframes on the active node...
12    for knob in node.knobs():
13        if node.knob(knob).isAnimated():
14
15            # ... then, if they're selected, add them to our selected_keys list.
16            for i in range(0, len(node.knob(knob).animation(0).keys())):
17                if node.knob(knob).animation(0).keys()[i].selected == True:
18                    selected_keys.append(node.knob(knob).animation(0).keys()[i])
19
20    print selected_keys
21
22# Add our function to the Curve Editor's right-click menu and assign F9 as the hotkey.
23nuke.menu('Animation').addCommand("Smooth selected keyframes", 'bm_Smoothie.bm_Smoothie()', "f9")
You probably noticed I've opted to print the results -- this is a useful habit to adopt. Any time you code a new part of your Python script, it's worth testing and printing the results every step of the way to make sure it's doing what you intended. Code is far easier to debug as you write it, vs. troubleshooting at the very end.
Let's save our bm_Smoothie.py file, restart Nuke, and give this a whirl. After creating a node, setting a few keyframes, selecting some of them and hitting the F9 shortcut we set, Nuke's Script Editor should output the same amount of keyframes you have selected.
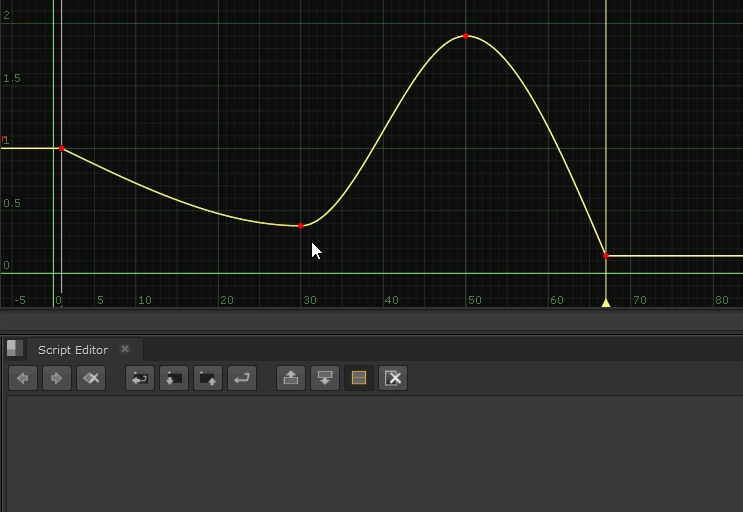
Now comes the fun part! We can loop through our selected_keys list and change the .la and .ra components. Add the following code to the end of your function:
 1# Loop through all selected keys and do the thing!
 2for keyframe in selected_keys:
 3
 4    # Set some boundaries. Values over 3 usually make a curve go nuts, so if that happens we reset to 1.
 5    if keyframe.la < 1 or keyframe.la > 3:
 6        keyframe.la = 1
 7        keyframe.ra = 1
 8
 9    # Otherwise we'll get the current value, and increment by 0.5.
10    else:
11        keyframe.la = keyframe.la+0.5
12        keyframe.ra = keyframe.ra+0.5
Saving our code, restarting Nuke, and testing our hotkey results in this:
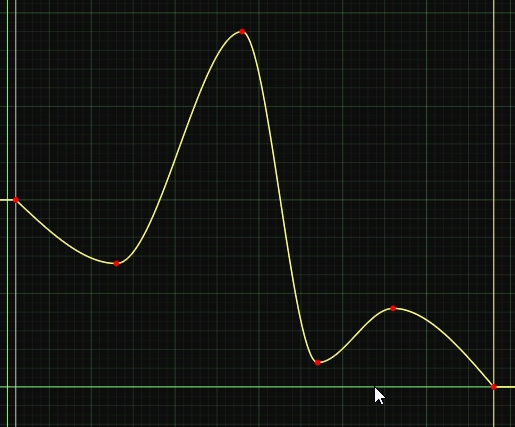

Earlier, I mentioned that the Curve Editor GUI is lazy and doesn't auto-update when you change animation curves with code. This is problematic when trying to make decisions about how curvy your curves need to be. Nuke's documentation tells the fable of the updateUI callback, however adding this into our bm_Smoothie() function doesn't seem to help (and callbacks that run every time your script changes aren't the best idea to use anyway). Instead, we unfortunately need to resort to a hack.
Switching a checkbox on and off appears to update the UI. Conveniently, most nodes that a Compositor might want to animate have a fringe checkbox. I've certainly never used the fringe knob or opened a Nuke script that has, so I figure it's safe to briefly modify. By toggling fringe on and off again, it forces a refresh! We can do that programmatically by adding the following code to the end of our function:
 1# Hack to force-update the viewer.
 2    if node.knob('fringe'):
 3
 4        if node.knob('fringe').value() == 0:
 5            node.knob('fringe').setValue(1)
 6            node.knob('fringe').setValue(0)
 7        else:
 8            node.knob('fringe').setValue(0)
 9            node.knob('fringe').setValue(1)
10    else:
11        return
Here is a gif of the tool in action.
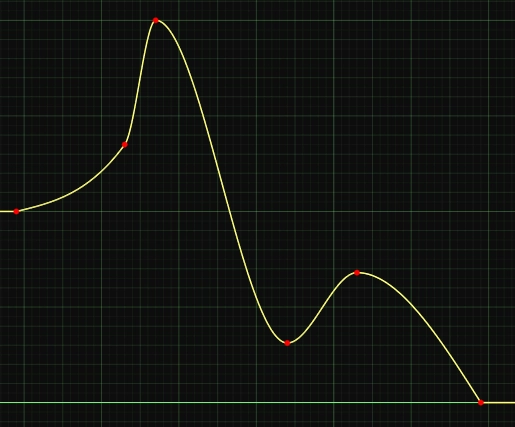
Our hack works! One gotchya to look out for is when the keyframe's interpolation is set to linear before running the code, the handle length will grow, but the keyframe won't smooth out. We should check and account for this at the start of our loop:
1# Loop through all selected keys and do the thing!
2    for keyframe in selected_keys:
3
4        # Check if keyframe interpolation is linear, and if yes, set it to smooth.
5        if keyframe.interpolation == nuke.LINEAR:
6            keyframe.interpolation = nuke.SMOOTH
7
8        # Set some boundaries... <code continued>
Note: Strangely, the hack we implemented to update the UI doesn't work for changing a keyframe's interpolation. However, simply selecting the keyframe is enough to force it.
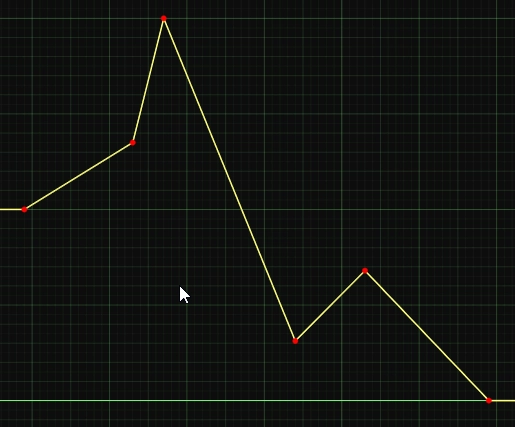
All that's left to do is some simple error handling. If no keyframes are selected, it would be a good idea to tell the user that nothing is happening. Add this code right after the selected_keys list has been populated:
1# If no curves / keyframes are selected, throw an error message.
2    if selected_keys == [] or nuke.animations() == ():
3        nuke.message("Please select at least one keyframe in the curve editor to smooth.")
4        return
And of course, the final code is below, or you can download the code from GitHub, place in your ~/.nuke directory, and then add import bm_Smoothie into your menu.py file to install.
 1# --------------------------------------------------------------
 2#  bm_Smoothie.py
 3#  Version: 1.0.0
 4#  Last Updated: July 20th, 2020
 5# --------------------------------------------------------------
 6
 7# --------------------------------------------------------------
 8#  USAGE:
 9#
10# - Easily smooth curves in Nuke's curve editor.
11#
12# --------------------------------------------------------------
13
14import nuke
15
16# Define the function.
17def bm_Smoothie():
18
19    # Set up a variable for easy use.
20    node = nuke.thisNode()
21
22    # Create a list to hold selected keyframes.
23    selected_keys = []
24
25    # Find animated keyframes on the active node...
26    for knob in node.knobs():
27        if node.knob(knob).isAnimated():
28
29            # ... then, if they're selected, add them to our selected_keys list.
30            for i in range(0, len(node.knob(knob).animation(0).keys())):
31                if node.knob(knob).animation(0).keys()[i].selected == True:
32                    selected_keys.append(node.knob(knob).animation(0).keys()[i])
33
34
35
36    # If no curves / keyframes are selected, throw an error message.
37    if selected_keys == [] or nuke.animations() == ():
38        nuke.message("Please select at least one keyframe in the curve editor to smooth.")
39        return
40
41
42
43    # Loop through all selected keys and do the thing!
44    for keyframe in selected_keys:
45
46        # Check if keyframe interpolation is linear, and if yes, set it to smooth.
47        if keyframe.interpolation == nuke.LINEAR:
48            keyframe.interpolation = nuke.SMOOTH
49
50        # Set some boundaries. Values over 3 usually make a curve go nuts, so if that happens we reset to 1.
51        if keyframe.la < 1 or keyframe.la > 3:
52            keyframe.la = 1
53            keyframe.ra = 1
54
55        # Otherwise we'll get the current value, and increment by 0.5.
56        else:
57            keyframe.la = keyframe.la+0.5
58            keyframe.ra = keyframe.ra+0.5
59
60
61
62        # Hack to force-update the viewer.
63        if node.knob('fringe'):
64
65            if node.knob('fringe').value() == 0:
66                node.knob('fringe').setValue(1)
67                node.knob('fringe').setValue(0)
68            else:
69                node.knob('fringe').setValue(0)
70                node.knob('fringe').setValue(1)
71        else:
72            return
73
74
75
76# Add our function to the Curve Editor's right-click menu and assign F9 as the hotkey.
77nuke.menu('Animation').addCommand("Smooth selected keyframes", 'bm_Smoothie.bm_Smoothie()', "f9")
Bonus: Of course, if we're really trying to mimic After Effects, we should add two more hotkeys: SHIFT+F9 for "easy-ease in" & CTRL+SHIFT+F9 for "easy-ease out". We can start by adding an argument when we define our bm_Smoothie() function.
1# Define the function.
2def bm_Smoothie(direction):
Then we can modify the main for loop, adding some more if statements to check the value of that argument:
 1# Loop through all selected keys and do the thing!
 2    for keyframe in selected_keys:
 3
 4        # Check if keyframe interpolation is linear, and if yes, set it to smooth.
 5        if keyframe.interpolation == nuke.LINEAR:
 6            keyframe.interpolation = nuke.SMOOTH
 7
 8        # ----- NEW -----
 9        # Easy-ease in / out functionality
10        if direction == "in":
11            keyframe.lslope = 0
12
13        elif direction == "out":
14            keyframe.rslope = 0
15        # ----- END NEW -----
16
17        # Set some boundaries. Values over 3 usually make a curve go nuts, so if that happens we reset to 1.
18        if keyframe.la < 1 or keyframe.la > 3:
19            keyframe.la = 1
20            keyframe.ra = 1
...and lastly, we can add the new menu items to tie it all together.
1# Add our functions to the Curve Editor's right-click menu and assign hotkeys.
2nuke.menu('Animation').addCommand("Smooth selected keyframes", 'bm_Smoothie.bm_Smoothie(None)', "f9")
3nuke.menu('Animation').addCommand("Easy-ease in", 'bm_Smoothie.bm_Smoothie("in")', "shift+f9")
4nuke.menu('Animation').addCommand("Easy-ease out", 'bm_Smoothie.bm_Smoothie("out")', "ctrl+shift+f9")

To wrap up, we should do some further testing. So far, everything appears to work as expected when we run bm_Smoothie on our Grade node's multiply knob. But what about the mix knob? What about a knob that can be split into 4 (like when we split the multiply knob into individual RGBA knobs) or a Transform node's translate knob? Does it work on rotoshape points?
You'll quickly discover that this example requires some more work to account for these differences. Your challenge, if you choose to accept it, is to take what you've learned in this tutorial, and try to figure out how to make bm_Smoothie work for any animation curve, on any knob. Message me once you've found the solution!
Useful resources and further reading:
AnimationCurve and AnimationKey objects
Using nuke.animation() without tearing your hair out
Foundry Python documentation on Animation
Simple fade expressions in Nuke
Bezier Curves from the Ground Up
If you liked this post, and would like to gain a better understanding of the fundamentals of Python in Nuke, check out my course: Python for Nuke 101.