Re-Graining Your Comp Using Existing Plate Grain

Matching grain can be tricky at times. The best way to add grain to your comp & get it to match the plate is to just use the grain from the plate!
For this example, I'm going to be using this stock footage from videvo.net.
First, we have to identify when this technique is useful, and when it might not be...
Usually, restoring the plate's grain into my comp is the first thing I'll try, just to see what happens. Although from experience, I can tell you this technique works great for shots where you have a flat background (perfect for greenscreen comps), or are adding elements like dust or smoke into a shot.
When it doesn't work so well is on shots with a wide range of luminance, or with any CG characters/objects. Grain has a different response in darker areas vs. lighter areas, so if you have a very unevenly lit greenscreen, but a consistently lit background to comp in, your grain will appear patchy. Another example would be if you're removing track markers from your plate, and doing it in such a way where you can't preserve the quality of the grain. More on this later, let's get on with the tutorial!
The basis for this technique is essentially looking at the difference between the plate with grain, and a denoised version of the plate. So, Let's denoise it! I always look at the blue channel first when denoising, as it's usually the channel with the strongest grain.
 Now, let's From the result of the denoise from the plate, like so:

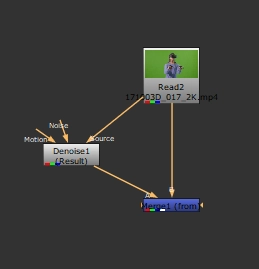
It's faint, but you can see with this setup, we're left with just the grain!
Now, I've pulled a quick and dirty key & slapped together a comp for the sake of this tutorial.
If we zoom in on the edges of the comp, you'll notice I've comped everything denoised.
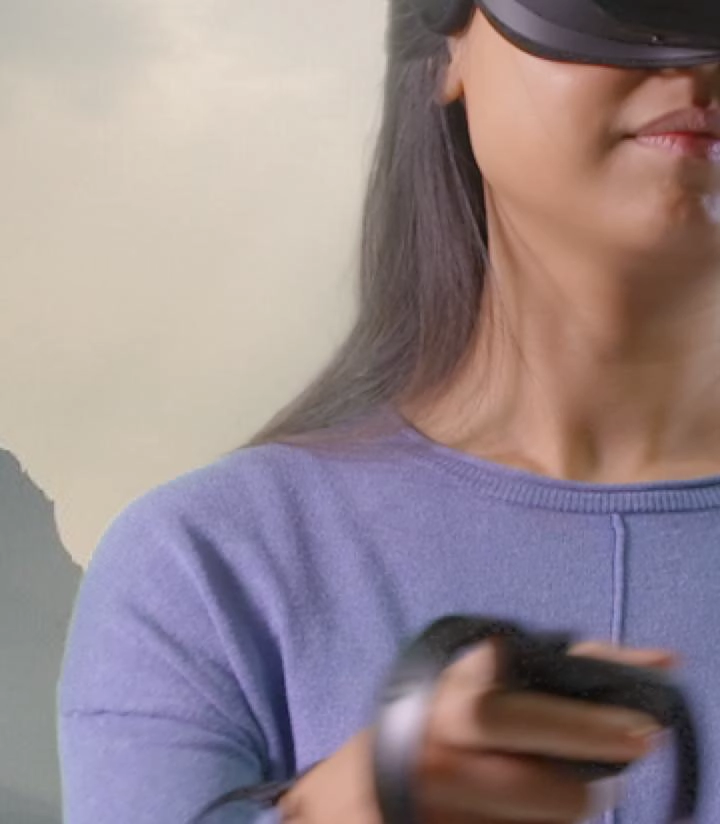
Now, let's Plus the grain plate we subtracted earlier to the whole comp. In the following gif, I'm looking at the blue channel again, and have added contrast for the sake of clarity
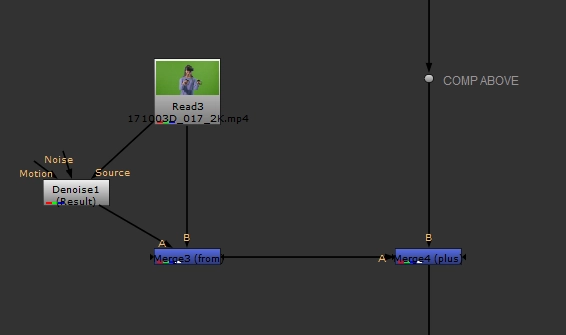
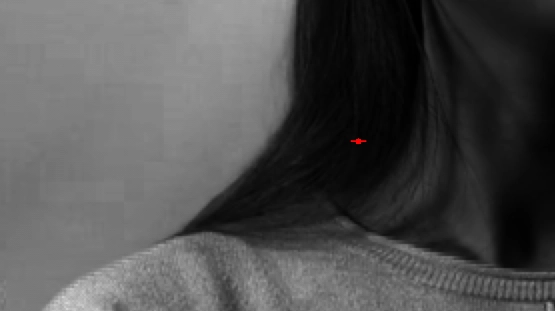
Voila! We now have our plate perfectly regrained, and have grain to match on our background! As a nice bonus, we've also restored all the artifacting apparent in any compressed Quicktime.
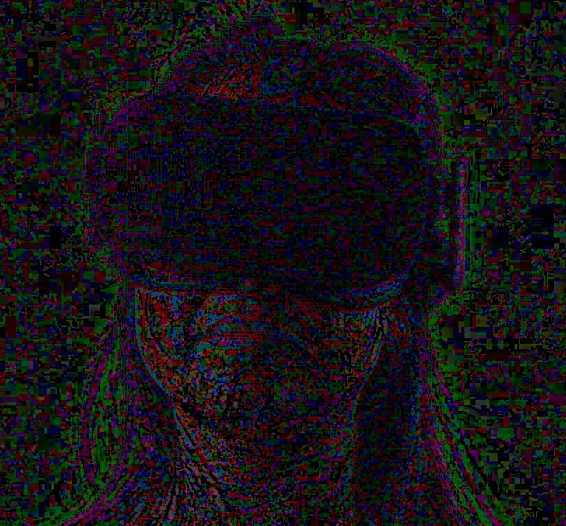
Usually, it's a terrible idea to degrain & regrain the entire plate, but using this technique ensures you're restoring all the detail that was lost. To prove it, here is an image of the difference between the final comp & the plate. Notice how the girl is completely black rather than all grainy? That means there's no change! We're only seeing a difference where greenscreen is despilled, the background is replacing greenscreen, or where there's lightwrap.

Seems too good to be true, right? In this case, it's working perfectly, but there ARE cases where this technique doesn't work, as outlined at the start of the post.
What happens when our greenscreen is really bright in some areas, and really dark in others? What happens if we can't remove tracking markers in a way that preserves grain? What do we do if there is a CG character filling most of the frame? Well, we can still use this technique, but we have to add a couple more steps.
Let's isolate the flat area of our greenscreen with a crop, and tile it across the entire format like so:
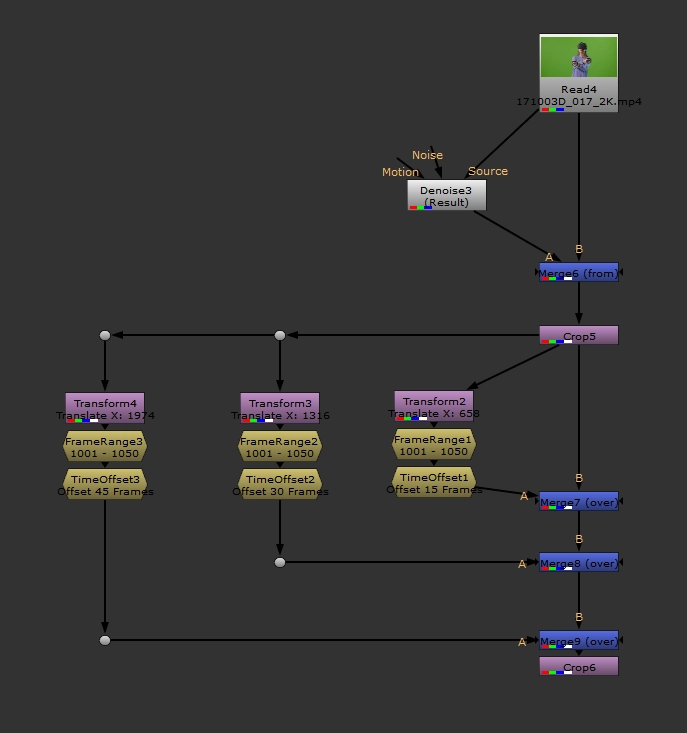
Each transform is translating the grain over to a blank patch, so the entire frame is covered. I've restricted the FrameRange to 1001 - 1050, and then each TimeOffset node is giving us a different part of that frame range. Make sure you change your plate's Read node settings so that the frame range is set to Loop.
We now have a completely even grain plate!
For shots with a large range of luminance, now is a good time to pull a luma key on your background plate, and use the result as a mask to multiply our flat grain plate to be brighter in the dark areas, and darker in the bright areas (to mimic realistic grain response).
Lastly, we still want to keep the lady in the foreground, as we don't want to change the grain on our plate. This can be achieved by Keymixing back your original grain plate, via your key.
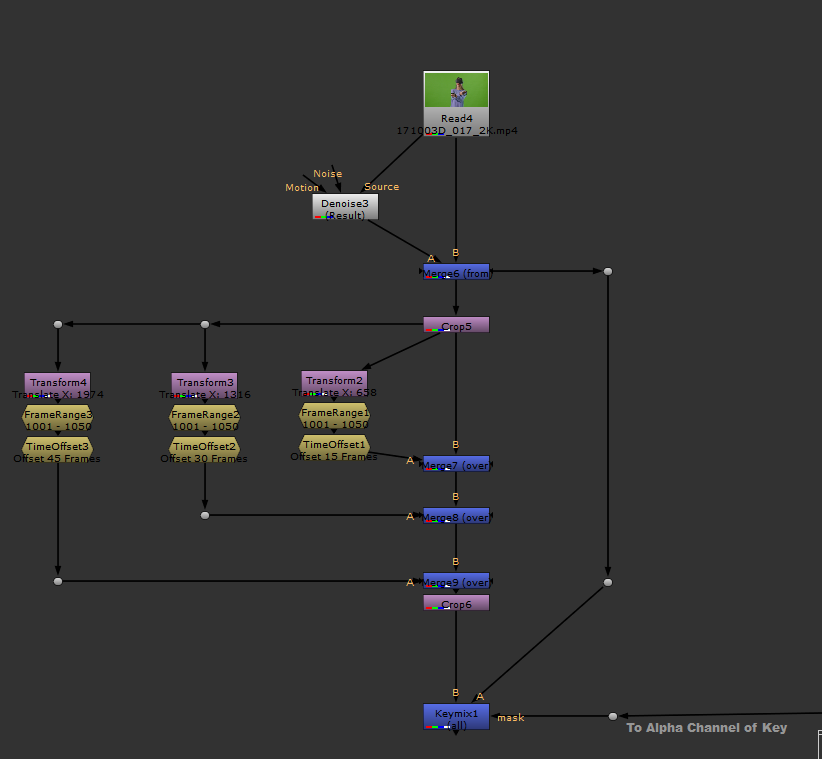

Plus the result of this back on top of your comp, and we're in business!
Now that you understand how this works, I can point you towards the simple gizmo I put together to achieve exactly this result! Click here to download bm_GrainTransfer.
I'll always try this regrain technique first, as it gives the most accurate results. Sometimes it fails, and when it does, I always have F_Regrain, and ScannedGrain with a grain plate from the show in my back pocket, which are both great options for re-graining your comp.